Lesson 2 - Running your first agent session
In the previous lesson you toured the workspace and used a quick chat. Now it’s time to start an agent session and make your first change to the project. You’ll keep it small: the games already have a star rating in their data, but the game cards on the home page don’t show it yet. You’ll ask the agent to surface it, review the change, and merge it as your first pull request.
In this lesson, you will:
- start an agent session and learn how a session is structured.
- ask the agent to make a small, focused change to the project.
- review the change in the workspace diff view.
- run the app locally to confirm the change in the browser.
- open and merge your first pull request.
Scenario
Each game in Tailspin Toys can have a star rating, and it already appears on the game details page. The game cards on the home page, though, only show the title, category, publisher, and description. As a warm-up, you’ll have the agent display the existing rating on each card — a tiny, self-contained change that’s perfect for your first session.
Anatomy of a session
A session is a conversation with an agent that runs in its own isolated workspace. Every session gets a dedicated git worktree and branch, which is what lets you run several sessions at once — one adding a feature, another fixing a bug — without their changes colliding. Your sessions appear in the sidebar grouped by repository; select any one to switch to it.
Inside a session you’ll see three things: the conversation with the agent, the agent’s tool activity as it explores and edits files, and the list of changed files with their diffs.
Start a session and request our change
Let’s start a new session to begin exploring the project and implementing our feature. In a prior lesson you added your project from its GitHub repository. We’ll create a new session for that repository and request our change.
-
Return to (or open) the GitHub Copilot app.
-
Select the Home screen.
-
Ensure
tailspin-toysis selected for the repo.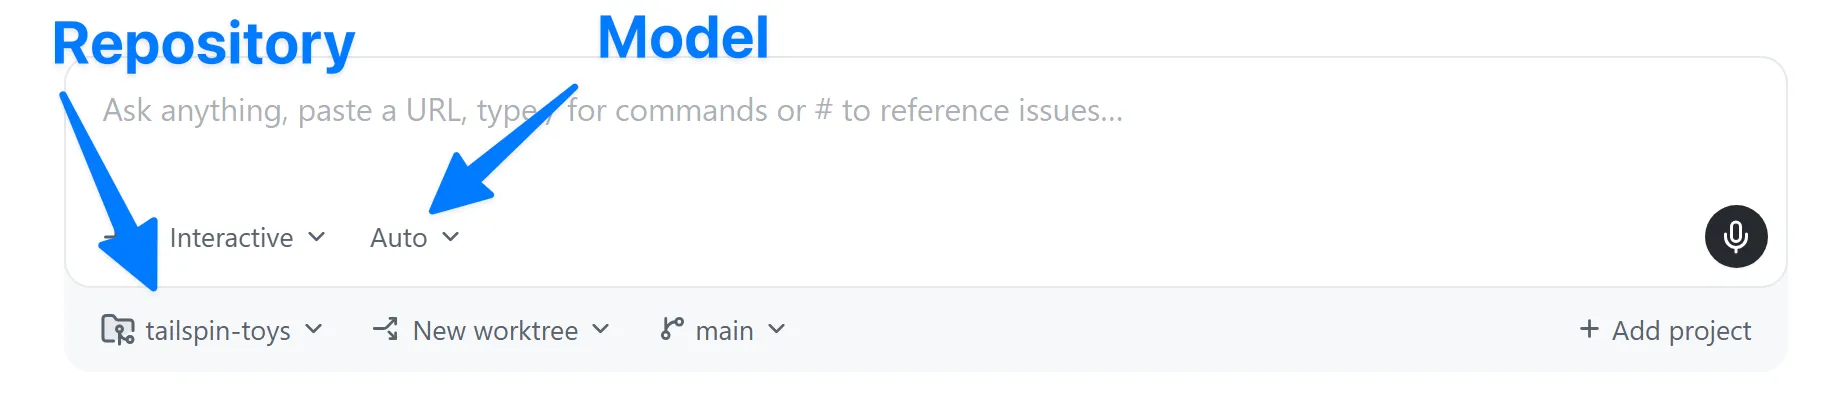
-
Use the following prompt to request the change:
On the game cards, show each game's star rating. The Game type already includes a starRating field — it's a number out of 5, or null when a game hasn't been rated yet. Display it on each card in src/components/GameCard.astro, and when starRating is null show "No rating yet" instead. Keep the change small and don't restructure the card layout.
Notice how the prompt contained the name of the file for Copilot to update. While it’s not required at all to specify which files Copilot should include in its work, pointing it in the right direction both helps Copilot quickly generate code and reduce token usage.
- Select Enter to send the prompt to Copilot.
Copilot app begins work by first creating a new worktree, an isolated copy of the project. It then explores the project, locating the necessary files to update to add the new feature. It will then create the necessary code. You’ve now added a new feature with Copilot app!
Review the diff
All AI-generated changes deserve a review before they’re merged, even small ones. Let’s explore the changes, right here in Copilot app.
-
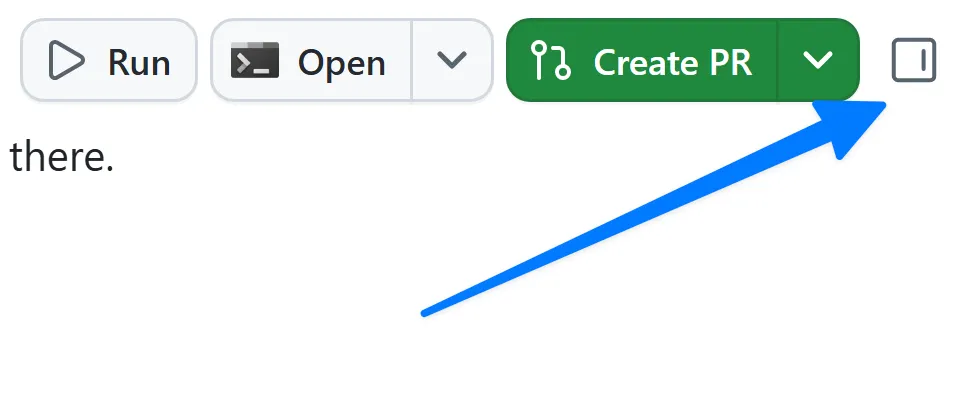
In the upper right-hand corner of the app, select Toggle review panel. This will open the diff screen with all the outstanding changes made by Copilot.
-
You should notice code added to
GameCard.astro, the core file used to display game details. It should be similar to the following — a small block that renders the rating when present and falls back to “No rating yet” whenstarRatingisnull:{game.starRating !== null ? (<span class="text-xs font-medium px-2.5 py-0.5 rounded bg-amber-900/60 text-amber-300" data-testid="game-rating">★ {game.starRating} / 5</span>) : (<span class="text-xs font-medium text-slate-500" data-testid="game-rating-empty">No rating yet</span>)}
Because Copilot, like all generative AI tools, is probabilistic rather than deterministic, the exact code may vary from the above. But it should be relatively similar.
Check the changes
Of course we shouldn’t just read the code and assume it works. We should visually test everything as well! To do so we’ll need to start the app from the terminal, then confirm everything works. Fortunately there’s a terminal built into Copilot app!
-
In the review panel on the right side of Copilot app, select Terminal. If there is no Terminal button, select the + (labeled as Open in panel), then select Terminal.
-
Enter the following command in the terminal window to start the web app’s dev server:
Terminal window npm run dev -
Once the server starts (this will just take a moment), open a browser window.
-
Navigate to http://localhost:4321.
-
You should now see star ratings on all the games on the landing page!
-
Return to the terminal window.
-
Select Ctrl+C to stop the dev server.
Open and merge your first pull request
Your change looks good — now it’s time to ship it! You’ll ask the agent to open a pull request, then review and merge it yourself on github.com. For now we’ll manage this manually. In an upcoming lesson we’ll explore how Copilot can handle some of the work for you automatically.
- In the upper right hand corner, select Create PR.
- If prompted, select Sign in with your browser and follow the prompts to authenticate.
- Copilot gets to work on creating the PR.
Once the PR is created, Copilot will monitor any workflows on the repository that need to run. After a few moments, the button in the upper right will change to Ready to merge. This will be your indication your PR is ready to merge!
- Select the PR bubble just above chat to open your PR in the review pane to see your pull request. You can review the PR as needed here.
- Once ready, select Ready to merge.
- Select Merge pull request on the new dialog window to merge your pull request!
You’ve now pushed a new feature to the website!
Summary and next steps
You’ve started your first agent session and shipped your first change! Specifically, you:
- started an agent session and learned how sessions are structured.
- directed the agent to make a small, focused change to the game cards.
- reviewed the change in the workspace diff view.
- ran the app locally to confirm the star rating in the browser.
- opened a pull request and merged it yourself on github.com.
Next, you’ll use the app to add a custom instructions standard to the repository — starting from one of the issues in your backlog. Continue to Lesson 3 - Guiding Copilot with custom instructions.